次は圧電ブザーで音を出す。これで踏切の要素が全て揃う事になるが、ブザーの模擬音なので音質はチープ。まあ、ちゃんとやろうとしたらサウンドシステムか何かを使う事になるんだろうが。スケッチはサンプルの toneMultipleからの改造で、LEDを交互に点滅させる処理を付け加える。
[ スケッチ:toneMultiple1]
void setup() {
  pinMode(13, OUTPUT);
  pinMode(12, OUTPUT);
}
void loop() {
  tone(6, 675, 500);
  digitalWrite(13, HIGH);
  delay(450);
  noTone(6);
  digitalWrite(13, LOW);
  tone(6, 675, 500);
  digitalWrite(12, HIGH);
  delay(450);
  noTone(6);
  digitalWrite(12, LOW);
}
サーボモーターは色々な使い方が出来そうだが、とりあえずすぐ頭に浮かぶのは踏切遮断機だろう。というわけで、次の練習課題では光センサーと組み合わせ、列車の通過を検知して遮断機を操作する。
[ スケッチ:Sweep1]
#include <Servo.h>
const int analogPin = A0;    // pin that the sensor is attached to
const int threshold = 150;   // an arbitrary threshold level
Servo myservo;  // create servo object to control a servo
// twelve servo objects can be created on most boards
int pos = 0;    // variable to store the servo position
void setup() {
  myservo.attach(9);  // attaches the servo on pin 9 to the servo object
}
void loop() {
  int analogValue = analogRead(analogPin);
  if (analogValue < threshold) {
    for (pos = 0; pos <= 90; pos += 1) { // goes from 0 degrees to 180 degrees
      // in steps of 1 degree
      myservo.write(pos);              // tell servo to go to position 'pos'
      delay(15);                       // waits 15ms for the servo to reach pos
    }
    delay(3000);
    for (pos = 90; pos >= 0; pos -= 1) { // goes from 180 degrees to 0 degrees
      myservo.write(pos);              // tell servo to go to position in 'pos'
      delay(15);                       // waits 15ms for the servo to reach pos
    }
  }
}
サーボモーターはラジコン等やる方にはお馴染みのパーツだろうが、私は経験が無いので今回が初めての購入となった。回路は簡単で電源と信号線だけ、スケッチも標準サンプルに入っていると教科書には書いてあったが、探すのに少し手間取った(結局、メニューをスクロールして行った一番下の方で発見)
[ スケッチ:Sweep]
#include <Servo.h>
Servo myservo;  // create servo object
// twelve servo objects can be created on most boards
int pos = 0;    // variable to store the servo position
void setup() {
  myservo.attach(9);  // attaches the servo on pin 9 to the servo object
}
void loop() {
  for (pos = 0; pos <= 180; pos += 1) { // goes from 0 degrees to 180 degrees
    // in steps of 1 degree
    myservo.write(pos);              // tell servo to go to position 'pos'
    delay(15);                       // waits 15ms for the servo to reach pos
  }
  for (pos = 180; pos >= 0; pos -= 1) { // goes from 180 degrees to 0 degrees
    myservo.write(pos);              // tell servo to go to 'pos'
    delay(15);                       // waits 15ms for the servo to reach pos
  }
}
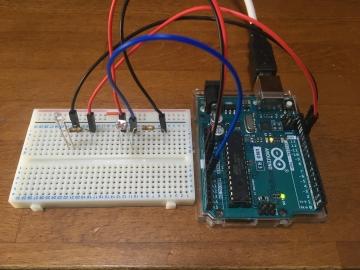
次の課題は鉄道信号だ。前項で光センサーは日没と共に照明が点灯するという想定で使用したが、今回は車両がセンサーを覆う事をトリガーに赤信号を点灯させる。なので、前項のLEDはそのまま赤信号と思えば良いわけだ。これに黄と緑の信号を加え、赤点灯で6秒後に黄に切り替え、さらに6秒後に緑に戻すというロジックで実験を行なった(教科書76ページ)。まずは結果の動画をご覧あれ。左下がセンサーだ。
光センサーを発展させ、LEDの自動点灯を試みる(教科書63ページ)。回路は入力側を前回そのままに、出力側にLEDを繋ぐだけだ。